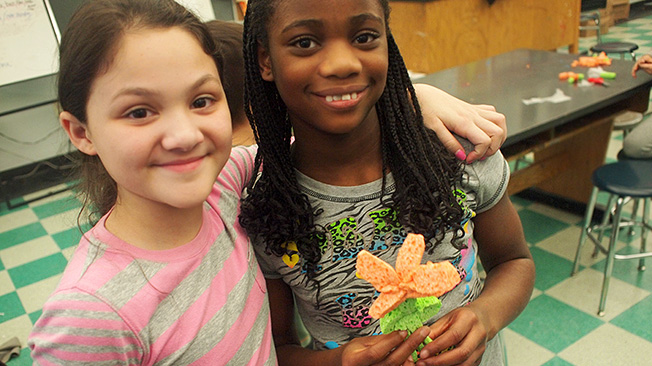
Roots and Shoots
What Is This Activity?
Can a plant pour itself a glass of water whenever it gets thirsty? Nope! Plants rely on their roots, stems, and leaves to take up and store water from the environment. In this activity, kids model how different characteristics, such as leaf thickness and a protective waxy coating, help plants store water and keep from drying out.
Introduction
-
-
00:00
What Are Kids Learning?
- All living things need water to survive. The absence or presence of water in an ecosystem determines what can live there.
- Water is a limited resource.
- Plants parts, including roots, stems, leaves, flowers, and fruit, help them survive and grow.
- All plants have a waxy outer coating called the cuticle. It covers the plant's surface and helps prevent water loss.
How Do You Get Ready?
- Gather the materials.
- Cut the sponges and paper towels roughly into the shapes of plant parts, such as stems and leaves.
- Read through the activity and either build your own model plants (to show kids after you explain the activity) or draw a few sketches of what you would build.
- If you have a houseplant, especially a succulent such as a jade, aloe, or cactus, bring it to your program.
- The night before you lead this activity, get a thin, soft leaf (a basil leaf, a piece of lettuce, a leaf plucked from a dandelion) and let it sit out overnight. Do the same with a leaf from a jade or aloe plant or an artichoke leaf. Bring them with you to your program. (optional)
Warm-up 10 minutes
Take a big, noisy gulp of water. Be dramatic about it–say, "Ahhhh, that was refreshing!"
Ask:
- What did I just do?
- Why do you think I did that?
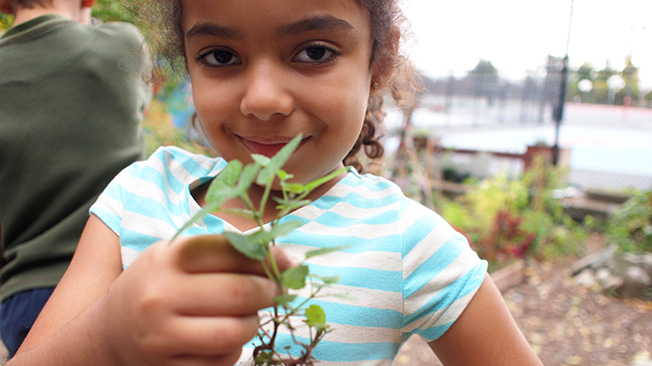
Hold up the plant for all the kids to see.
Ask:
- What does this plant do when it gets thirsty? Can it pour itself a cup of water?
- How does this plant get the water it needs?It takes in water through its roots. This water travels through the rest of the plant.
- What covering does the outside of your body have?Skin
Explain that one of the many things your skin does for you is to keep your body from drying out. Tell kids that plants also have a special coating that keeps them from drying out. It is called the cuticle and is made of a waxy material.
If you brought in a plant, give kids the chance to gently touch it. Break an aloe or jade leaf in half so kids can see and feel the inside, if you have one. If you brought samples of leaves left out overnight, pass them around for everyone to see. Talk about how the thin leaf changed overnight as compared to a thick leaf. (optional)
Activity 40 minutes
Part A Show and Tell
Show kids the materials.
Ask:
- How could we use these materials to build model plants that take up and store water?
- Which will hold water longer: plants with thick leaves and stems, or plants with thin leaves and stems? How could we find out?You could build one model plant with sponge leaves and stems, and another with paper towel leaves and stems- Other than the type of material you use, the plants should look the same and be the same size. Pour water on both and see which one dries out first.
- How could we use the waxed paper to show how a wax coating helps keep plants from drying out?You could build one plant with a waxed paper coating and another without the coating. Other than the wax coating, the plants should look the same and be made from the same materials. Pour water on both plants and see which one dries out first.
Show kids the models you built, but emphasize that their plants should be their own creations–they do not need to copy what you did.
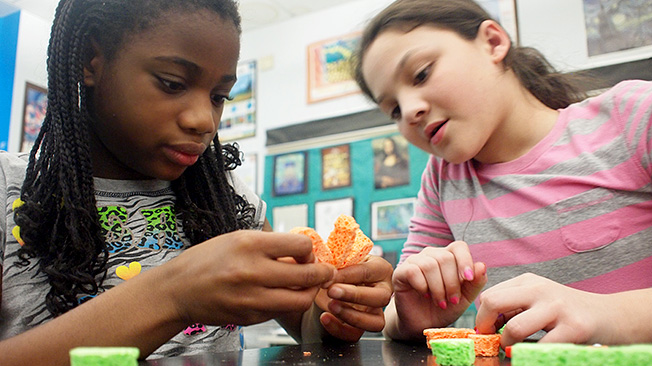
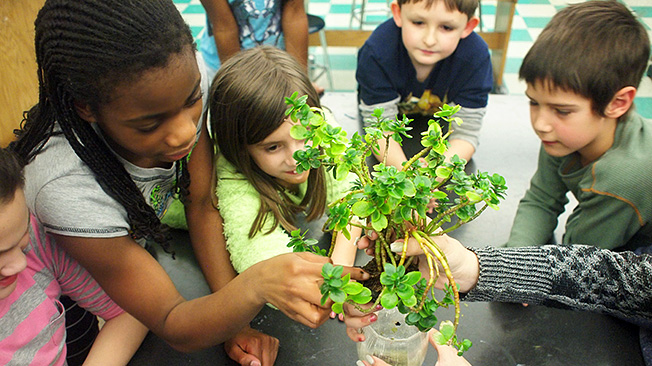
Part B Brainstorm and Build!
Have kids work in pairs to build two model plants. Their goal is to compare how just one feature–either a waxy coating or leaf and stem thickness–affects how well a plant takes up water and keeps from drying out. To best see how this one factor–either a wax coating OR leaf thickness–affects their model, it should be the only thing that's different between the two plants.
Give kids two minutes to talk with each other about how they will build their two model plants. Circulate among the group while kids sketch their ideas in their field books.
Ask:
- How will you make leaves? Stems? Roots?
- How could you use the waxed paper?
Hand out materials and give kids about 15 minutes to build their models. Remind kids to think about how their model will represent roots (the parts of a plant that take up water from the soil) and to not wrap that part completely in waxed paper. Glue and tape will not hold together in water; have kids use string and staples to fasten the parts of their creations.
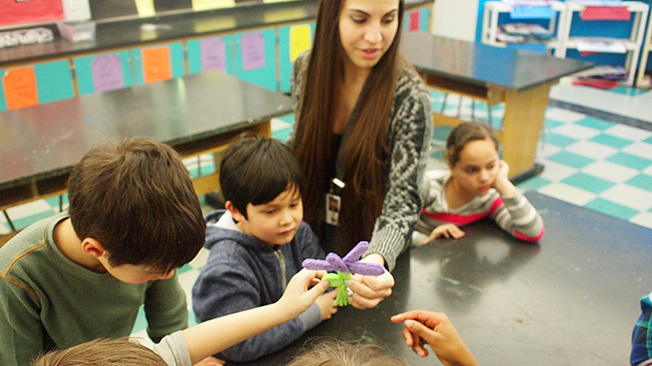
Have kids share their models with the class and predict what will happen when you pour water in the model plant's environment.
Ask:
- What will happen if we pour water onto the plants?
- What might happen to the water in the plants if we let them sit out overnight?

Part C Make It Rain
- Stand the model plants on a plate.
- Pour about 1/4 cup of water on the plate, taking care to not pour it directly on the plants. Watch the water. Where does it go?
- Remove the model plants from the wet plate and place them on a dry plate, or on a countertop where they won't be disturbed.
Leave the plants sitting. After several hours, or even overnight, revisit the plants.
Ask:
- Did they change? How?
- What do you think would happen if you built an identical plant, but you didn't coat it with waxed paper? Give it a try!
- What do you think would happen if you built a plant that looks different–taller, shorter, fatter, or has a different shape? Give it a try!
Note: If you are running a drop-in program and won't see the same kids the next day, you might want to send the plant models home so they can observe them with their families.
Wrap-up 10 minutes
Ask:
- How will the plants change over the next few hours or overnight?
- What do you expect to see tomorrow?
Ask for a few volunteers to show what their model plants look like now and to predict how they will change over a few hours or overnight. Have kids jot down their predictions in their field notebooks using full sentences.
If you are able to reconvene the group a few hours later or the next day, have a quick look at everyone's models. (Otherwise, have kids take their plants home to examine the following day.)
Ask:
- What do your model plants look like now?
- Did any of your model plants dry out? Which ones?
- Did any of them hold water overnight? Which ones?
- What differences are there between plants that dried out and ones that kept their water?
Explore Some More
Plants in the Produce Aisle
Bring in an assortment of produce and herbs, such as celery stalks, lettuce leaves, artichoke petals, asparagus spears, rosemary leaves, and basil leaves. You also could bring in houseplants, such as jade, aloe, cacti, ferns, and philodendron. Give kids time to explore the items.
Ask:
- Which of these do you think is best at storing water? Why?
- Which will lose water the quickest? Why?
Let the produce and herbs sit overnight on a plate or paper towel. The next day, ask kids to examine them. How did they change? You also might ask kids if they can figure out which part of the plant–root, stem, leaf, or flower–each piece of produce is. They might be surprised to learn that the nodules on a head of broccoli are actually flower buds!
Explore Roots
Remove a small potted plant from its container and shake off the soil. Show students the roots.
Ask:
- What are these?
- What do they do?They take up water and nutrients from the soil.
- How do their roots help plants survive in different ecoystems?By growing deep into the ground to reach water, by branching out close to the surface of the ground to absorb water as it begins to absorb into the soil
Encourage kids to think about how the plants they see every day–grass, trees along the sidewalk, weeds growing along the roads–get the water they need. Roots often extend as far out as a tree's canopy. Take some chalk and mark out how far the roots of a tree might extend under the sidewalk.
Curriculum Topic
adaptation
Activity Type
indoor
Group Size
whole classroom, working in pairs
Activity Time
60 minutes
Materials
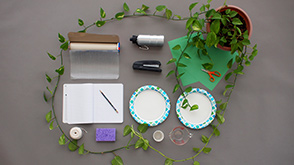
- 2 dinner-sized plates, paper or plastic (per pair of kids)
- 1 kitchen sponge, approximately 3.5 x 6 x 1" (per pair of kids)
- 2 pieces of paper toweling or colored construction paper (per pair of kids)
- 4 pieces of waxed paper, approximately 8 x 11" (per pair of kids)
- Paper or plastic cups or other small containers
- Scissors
- String
- Stapler
- Water
- Field notebooks and pencils
- A potted houseplant or herb, or a dandelion or other small plant with its roots intact (only one for the class to look at as a group)
- A water bottle or cup of water (for you to drink)
Standards
Next Generation Science Standards
Disciplinary Core Ideas
Science and Engineering Practices
- Asking Questions and Defining Problems
- Planning and Carrying Out Investigations
- Obtaining, Evaluating, and Communicating Information
- Analyzing and Interpreting Data
- Constructing Explanations and Designing Solutions
- Engaging in Argument from Evidence